|
|
|
Got art?
You bet! You can create lots of things at home on your.
Shrinky Dinks- Did you know that if you use plastic marked #6 it can be used like a Shrinky Dink. You can use colored sharpie or if you lightly sand the surface you can use colored pencils to add color. You have a shrinky dink and you recycled!
*Please be sure to have parents help you with this*
Supplies
- Clean #6 Plastic
- Permanent Markers
- Scissors
- Aluminum Foil
- Oven and Tongs or Oven Mitt
1. Obtain a piece of #6 plastic (polystyrene). Most clear containers at salad bars, delis, and grocery stores will work. Just flip it over and look for a “6” inside the recycling arrows. If you ask nicely, they’ll usually give you a fresh one.
2. Cut any excess plastic away to make a flat sheet (use both the top and the bottom), and recycle the excess.
3. Draw or write your desired image or text on your plastic canvas using permanent markers. The total image will shrink to about a third of its original size, and five or six times its original thickness. ( of course, you could measure before and after, and figure how much it had changed.)
4. Pre-heat your oven to 350°, and place a rack in the lowest position. Create a “tray” out of the aluminum foil by bending up the sides. Technically, you could cover a baking sheet with foil, but the thinner surface allows for more direct heat and quicker shrinking.
5. Place your art in the tray, then use the tongs or an oven mitt to place the foil on the bottom rack.
6. For the first minute your art will curl up all crazy-like, but soon, it will flatten itself out. If you have an oven door through which you can see, then just keep an eye on it. If your door is solid, open it just slightly (as you would do when broiling) after 90 seconds. Total time for a large piece (5-6” starting size) will be about 3 1/2 minutes.
7. Using the tongs or oven mitt, remove the tray. At this point, it’s still soft so if you want to flatten it more, or add waves or bend the corners, do so CAREFULLY within the first ten seconds.
8. Now, you can do as you please. It’s still cut-able, sand-able, drill-able, glue-able, and plenty more. Attach it to jewelry, make a luggage label, or even a guitar pick!
*Please be sure to have parents help you with this*
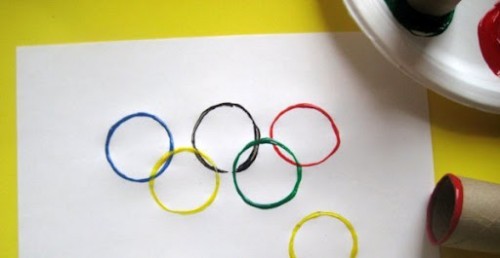

Paper towel tube printing
This is another fun activity that can be done at home. You will need a paper towel tube and some paint. If you pinch or change the shape of the tube you can create different shapes like hearts.
Use fabric paint and create a one of a kind T-shirt. How fun!
This is another fun activity that can be done at home. You will need a paper towel tube and some paint. If you pinch or change the shape of the tube you can create different shapes like hearts.
Use fabric paint and create a one of a kind T-shirt. How fun!
